Liquid Cooling Tips to Avoid Mistakes
Jun 17, 2019 | 2-Min. Read
Erik Nastovski
In part 3 of useful tips, we’ll take a look at some things that might go wrong for custom liquid cooling builders and how you should avoid them.
Not plugging all unused ports
Even experienced builders and tech reviewers sometimes forget to plug all unused ports. Make sure 2 ports are plugged on your GPU block in case you’re not using a parallel loop configuration. The GPU block is the most often overlooked part for plugging, also be sure to plug all other unused ports in your custom loop.

Not properly bleeding the loop
Not bleeding the loop of air can cause higher temperatures, higher noise and ultimately lead you to be unhappy with all aspects of your loop. So be sure to bleed out all the air by cycling the pump speed and tilting your case if needed.

Not following instructions for chemicals whether coolants or cleaners
More often than not, the colored coolants fall out due to not following the instructions for use. Be sure to check out what you can use to prepare the loop before using colored coolants to have a maximum lifespan of the coolant.
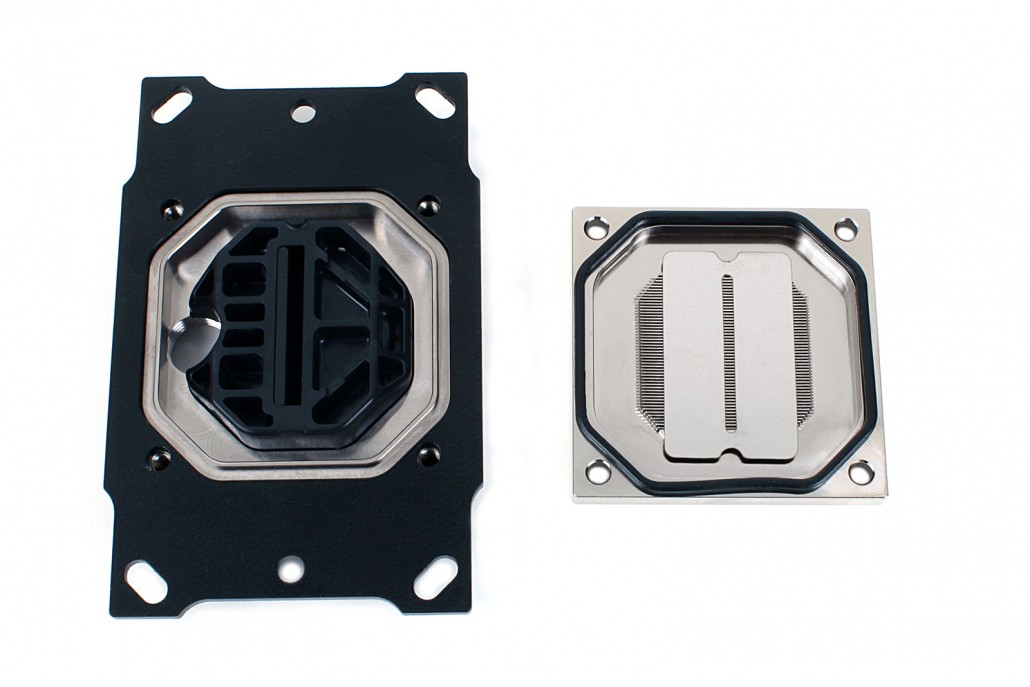
Improperly reassembling the CPU block whether leaving out the jet plate or reinstalling the top with an incorrect flow pattern
Countless times customers have had issues with flow and CPU temps after reassembling the CPU block. Usually, it’s due to flipping the jet plate by 90 degrees, making it go alongside the microchannels instead of cutting across them. The correct orientation of the jet plate is as you can see below.
Not flushing radiators
Flushing the radiators is recommended, removing the potential excess soldering remains or leftovers from production. EK’s recommendation is using hot tap water and shaking then proceeding to clean it with a few distilled rinses.

Not testing components before use
You’re building a brand new PC, all components just arrived, you assemble the PC and after that liquid cooling only to figure out the motherboard was DOA, and having to disassemble everything. To save time, we highly recommend testing new components before building a loop in order to save time if something is not working correctly.